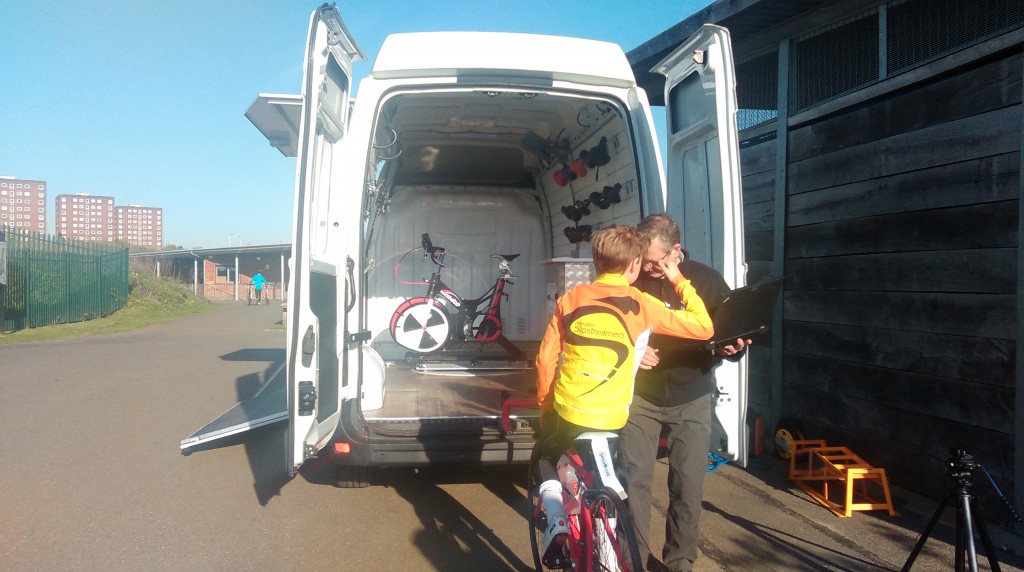
The Velocity Van Visits Slipstreamers – Ollie and Royce
Last weekend was the second and final of the free pedal stroke analysis and bike fitting sessions offered by Royce Murphy, one of our Volunteer Coaches. Royce spent time with individuals on a 1:1 basis assessing pedalling techniques and looking at areas that could be improved around symmetry, bike fit and general discomfort on the saddle.
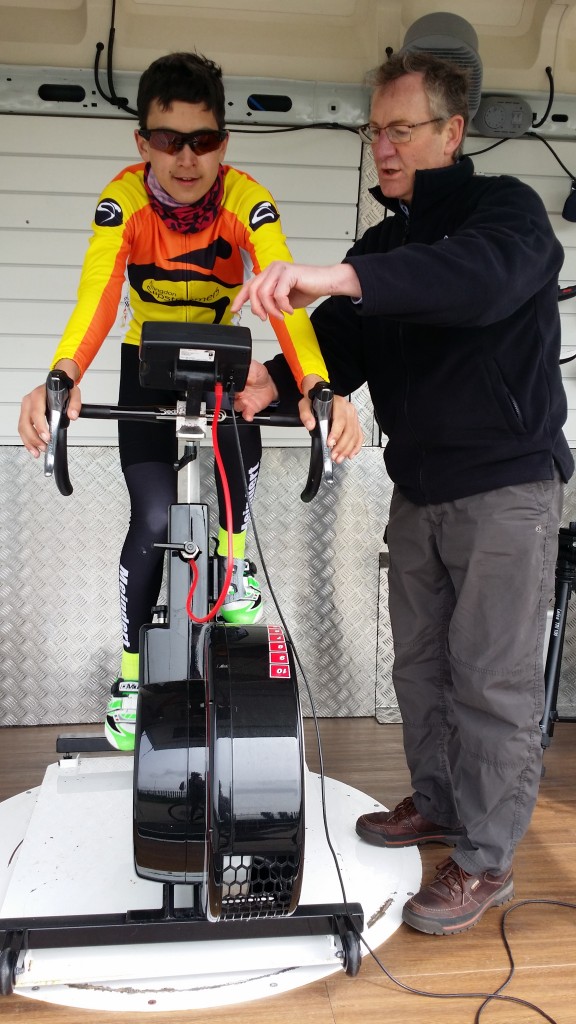
Rizwan and Royce
What did a few of our Members who took part think?
Oliver Emment said: ‘My saddle needed to come up and move forward so I was sitting better on my saddle, which should help me get more power each time I pedal.”
Anastasia Vockic has been struggling to get her bike set up correctly: “He took the time to explain every step of the process and the reason behind each of the tests. He was very patient and answered all my questions, regardless of how silly and ignorant they sounded. After twitching and making small changes on the bike, I felt, immediately, more comfortable. I can highly recommend the testing.”
Oisin Murphy discovered: ‘The analysis from the pressure pad placed on the saddle indicated a lot of movement in the seated position when riding. Royce suggested lowering the saddle slightly to mitigate this. This was backed up by the data taken from the video footage of the pedal stroke and the subsequent measurement of leg extension. Royce also felt that the length of stem needed to be shortened a bit to facilitate a more upright riding position, which might be more comfortable. Cadence and balance was really interesting stuff, with one leg drills and pedalling drills prescribed.”
A Few Thoughts from Royce
Royce’s Rough & Ready Guide to Bike Fit
“It is difficult when children are growing quickly to keep them in the optimal position on their bike. It’s not practical to buy a new bike every 6 months, so here is some advice to help parents/guardians balance cost with injury prevention, performance and comfort. There are entire books written on bike fit, so this is just a rough and ready guide. But if you follow these principles, you will do more good than harm.
Bikes can be adjusted around their frames by changing stems, seat posts, handlebars, crank-sets and saddles; and these relatively minor and inexpensive changes can make a big difference in the fit. Please bear the following points in mind to help your rider stay healthy and happy on their bike:
- The most important objective of a bike fit is injury prevention.
- The most common cycling injury due to bike fit (as opposed to falling off) is knee trouble; followed by lower & upper back, neck, hands/wrists and shoulders.
To look after riders’ knees there are three simple things you can do. Given the rate at which children grow, you should check these regularly:
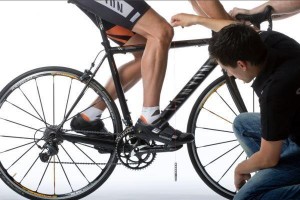
Figure 1 – Knee Over Pedal Axle
Saddle Positioning:
- Ensure the rider’s saddle position (fore/aft) is adjusted so they are sitting toward the back of the saddle rather than on the nose.
- When they are in the right position on the saddle, check that their knee is over the pedal axle when their feet are level (3 o’clock & 9 o’clock). You can see in Figure 1, that a plumb bob dropped from the base of the knee should pass through the axle of the pedal.
- The saddle has horizontal rails, and you can slide it forward and back to change its position under the rider. If the rider’s knee is ahead of the axle, it pushes their kneecap back into their leg bones.
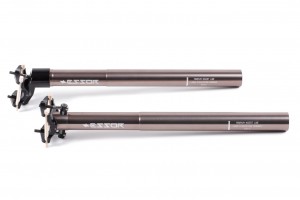
Figure 4 – Set-Back and In-Line Sets
- If the rider’s knee is behind the axle, they are pushing out rather than down on the pedal stroke, and that puts extra strain on the knee tendons.
- In some cases, the bike’s geometry will not enable you to get the rider’s knee in the optimal position even when the saddle is at the extreme forward position on the rails.
- In that case, you may need to buy another seat post, which will position the saddle further forward. Most seat posts have saddle clamps that are “set-back”, but some seat posts have “in-line” clamps, and those will allow the rider to get further forward (see figure 4).
- As the rider grows, you can go back to the original set-back post.
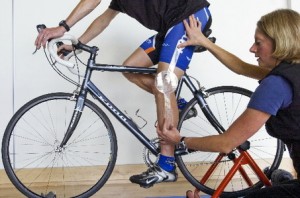
Figure 2 – Leg Extension
Saddle Height:
- Ensure the rider’s saddle height allows them to extend their leg to an effective angle. We look for leg extension between 140 – 150 degrees – refer to Figure 2 to see how it is measured.
- At Velocity Sports Cycling, we video the rider and use special software to measure the angle while they are riding. You can buy a “goniometer”, like to one shown in the photo; or just approximate the proper angle.
- Please note: saddle positioning and saddle height affect each other, so you may need to iterate a couple times between them to get the final position.
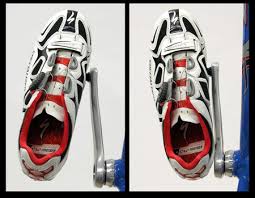
Figure 3 – Cleat Rotation
Cleat Positioning:
- Our feet do not all point perfectly straight ahead when we walk. They may toe-out or toe-in. If the rider’s cleats are positioned on their shoes to make their feet point straight ahead, that may twist their knee into an un-natural angle.
- So, determine whether your rider’s feet toe-in, toe-out or are straight ahead, and then adjust the rotation of the cleats on their cycling shoes to allow their foot to adopt the same position on the bike.
- Figure 3 shows two extreme examples. Ensure you do not over-adjust and end up with the rider’s shoe rubbing against the crank arm.
What I Discovered at Slipstreamers
The most common problem I found in the bike fittings we did at Slipstreamers was the rider’s reach from the saddle to the handlebars. This can affect their safety as well as cause back, shoulder, arm, wrist and saddle sore issues. In the effort to buy a frame that will last a while, many of the riders were on set-ups too long for them. So, they were stretching too far to reach their hoods. Often, they moved forward on the saddle to shorten the reach, and that moves their weight from their sit bones on the rear of the saddle to their soft tissues at the nose of the saddle. The riders also had straight arms, which doesn’t allow good control of the bike. So…
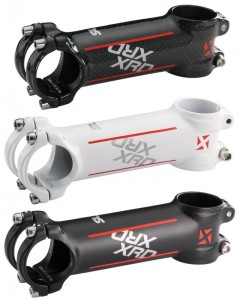
Figure 5 – Stem Lengths
- You want their elbows to have a slight bend when their hands are on the hoods, and their shoulders should be relaxed.
- Get their knee over the pedal axle first, and then change the reach to allow them to stay in the right position relative to the pedal axle and sitting on the right part of saddle.
- You don’t want them scooting forward on the saddle to reach the bars. Bring the bars back to them.
- You can effectively shorten the bike and reduce the reach by fitting a shorter stem.
- Figure 5 shows some different length stems, and they generally range from 65mm to 125mm in length.
- If the frame is relatively large for the child, then you should look at buying a shorter stem to reduce the reach. You can move to progressively longer stems as the child grows.
And finally…
If you do want an excellent book on Bike Fit, then I can recommend a new book written by the head physio at British Cycling and Team Sky, Phil Burt – click here to view.”
Wow! All we can say here at Slipstreamers is THANK YOU ROYCE! You have been absolutely fantastic and we have no doubt our children will be better cyclists for your time and effort donated to the club during these free sessions. If anyone wants to contact Royce for a private session, do visit Velocity Sports Cycling for details.